Showing posts with label Quilt Finish. Show all posts

Saturday, July 16, 2022

Quilts For Moms

 I waited to make this post so I could share two quilts at once. While it's fun to make secret sewing projects I find it hard to keep it a secret! I guess I just enjoy quilting too much and want to share! One is a mini quilt that went to my mother-in-law and the other is a lap quilt that went to my mom. I thought it was fitting to share them in one post.

These quilts were made entirely with scraps and fabric I had on hand with the exception of the border in the lap quilt.


I learned how to make hourglass blocks. They're so fun! 
I will definitely have to make more.


I love making mini quilts and wanted to make one a month this year but abandoned that after this one.
I realized that Connor's graduation quilt needs to take priority.


  quilt # 46
10" x 10"
machine pieced & quilted


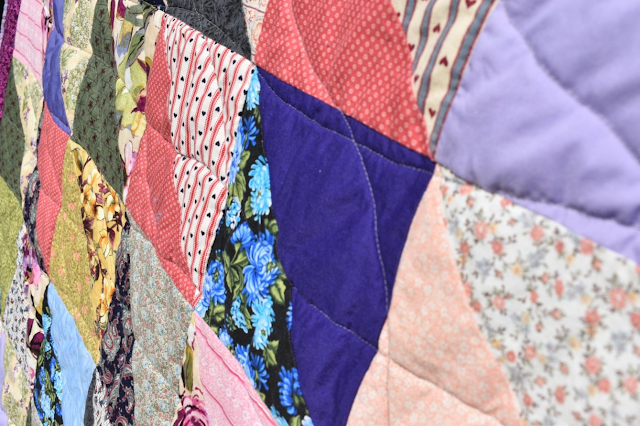
I made scrappy triangles for the lap sized quilt.
The fabric for the triangles all came from a bag of 8" squares found at a thrift store.
(I still have some left!) All I did was sew two together diagonally and cut them apart.


Making these triangle blocks was a dry run of sorts for the graduation quilt.
It's good to have extra practice.


Beautiful blue flowers for the backing, also found in my fabric stash.


A behind the scenes look at the quilt holder...it was a little breezy.


Found this little Bob Ross treasure in a scrap bag I bought at one of my favorite vacation quilt shop stops.
Perfect for my mom.


The best part was being able to surprise both moms.
:)

quilt# 47
approx. 50" x 56"
(I forgot to measure this before I gifted it, that's design size and not after washing & shrinking.)
machine pieced & quilted

Sunday, May 22, 2022

Strings Baby Quilt

I tried a new-to-me quilting technique.
I loved it. It was quick and easy.
I have a container I keep bright scrap strips of fabric.
I had no idea what I was going to do with them but I couldn't throw them away!
I had seen what's called string quilting. It sounded easy but just never took the time to try it.
A few months ago I saw a post on a blog using this technique that piqued my interest.
The blogger's quilt sparked an idea and this quilt was started.


The idea behind string quilting is to take phone book paper, or similar paper, and sew strips of  "strings" to it. This keeps the fabric from running amuck and getting distorted. When you finish sewing all your strips you trim it to the size you need and remove the paper.


Here is the back side after sewing the strings.
It's so much fun!
Simple and mindless sewing.
Don't have to match anything, just grab another string!


The pile on the left was trimmed to 3" wide.
After I trimmed them I sewed them into long strips.
Then I cut them the lengths I needed for my quilt.


I added borders in between the string strips to calm down the madness.
It's kind of like an eye spy quilt.
There's everything in there from chickens and dragonflies to anchors and clocks.


I went with simple walking foot waves for the quilting.
(Pre-wash non-crinkle photo.)


Post wash crinkle photo.


I forgot to measure this before I dropped it off at a local charity.
I know it was slightly smaller than my original design due to a larger seam allowance (oops).
So I'll give an approximate size.

quilt #45
40" x  55"
machine pieced & quilted

Saturday, April 09, 2022

Emerald

I have finished yet another mini quilt.
I'm going to try to make one a month this year.

Here it is before I quilted it.
Figuring out what to quilt seems to be the hardest part for me.
I'm always afraid to pull the trigger. I don't want to mess up a quilt.
It's rather time consuming to rip out quilting stitches!


I finally came up with a plan and thread color.
The quilting shows up the best on the back side.
All in all, not bad. I'm quite happy with it.


I no sooner put the quilt down to take a picture and a cat came over to investigate.
Silly kitty.


I have been taking these mini quilts to my cubicle wall at work.


Nice to have a little color.


quilt stats:
emerald
mini quilt
#44
7 1/2" x 7 1/2"
machine pieced and quilted

Saturday, February 05, 2022

Mini Sudoku Quilt


I finished another mini quilt!


It's a Sudoku quilt.
That means each row/column/box has only 1 each of 9 different fabrics.
This was so much fun to make.


This was completely made from scraps, including the striped binding.
I keep all of my trimmed bindings so I didn't even have to make any for this quilt.
:)


I'm quite fond of striped bindings.
They add a little fun to the edge.


The colors are a little more accurate in this darker photo.
I decided to free motion quilt this. I hadn't done that in a while.
I practiced for a little bit before hand.


I'm taking this little quilt to work to hang on my cubicle wall.

Quilt stats:
mini sudoku quilt
#43
12" x 12"
machine pieced and quilted

Saturday, January 08, 2022

New Year's Day Quilt

 
I have another quilt finish!


I love mini quilts and have made a few.
I keep all my triangle trimmings from making binding and throw them in a glass jar.
While they're pretty, I have mini quilt intentions with them.
Mini quilts intrigue me.
They can be done quickly but they need more precision to make.
...and quite possibly more patience as well.
So New Year's Eve I decided to tackle one.

I started this around 6 PM with the intent to finish it that night.
(Enter copious amounts of laughter.)
By 8 PM I had it sewn together and ready to quilt.
It did not take that long as there were breaks taken while sewing.
Anyways... my mind was willing but the body reminded me that I'm no spring chicken.
Plus I wanted to do some research on binding a mini quilt.
So I finished the next day.
Nothing like starting a new year with a quilt finish on day one!

It is made entirely of scraps, including the batting.


The backside.
The binding is not wonky by the label. The shadows are playing tricks.
I plan on taking this mini to work and hang it on my cubicle wall.
I'd like to fill my wall with these. That would be cool!


New Year's Day mini quilt
#42
6" x 7 1/4"
machine pieced and quilted

Sunday, January 02, 2022

Village Quilt


I have finally finished the Village Quilt!
I completed the top back in 2018.
Then it sat on the back burner for several years so I could make some graduation quilts.
I decided that 2021 would be the best year to get this one done before I had another round of graduation quilts to make.
I made myself a goal and got to quilting.


The closer I got to my self-imposed goal I realized I might not make it.
It just so happened that one of the quilt bloggers I follow had created a challenge to get stuff done.
The challenge was to use the last 100 days of the year to finish some unfinished projects.
I thought this is the perfect way to keep up with my goal.
And it was.
I finished hand quilting on Christmas Day.
That left me six days to get the binding done.
(WIPS: Work In Progress)
PS- All the blanks in the "S" were from when I had Covid. I worked from home everyday, except one, while I was sick. I used all my energy for work and was too wiped out to quilt that week.)


There's this unspoken "rule" that you're supposed to hand sew the binding to the backside of a quilt. It's traditional and I get that. However, since the beginning of my quilting adventure I learned how to sew it by machine. It's much faster. So that is how I do almost all of my quilts. 


I can confidently conquer corners now.
:)


 I chose an old world map fabric for the back.
I learn a lesson (or several) with each quilt.
One of those hard lessons was this backing fabric.
I measured and purchased what I needed, or so I thought.
Upon cutting the fabric I realized I didn't have enough because I failed to remember that it is a directional fabric. Meaning it has to face a certain direction as opposed to any which way.
That makes a difference in how much fabric you need.
So this really cool looking fabric is sideways on the back...and I still didn't have enough.
To make it work and not have to purchase more fabric (and wait for it to arrive) I needed to turn the fabric sideways. Not my first choice...
Even with that change I still had to add a strip to make it fit the back.
Pride swallowed.
Lesson learned.


This is one of my favorite quilts.
Except for the outermost border, binding & backing, it is all scraps.
I had so much fun making this.
A lot of the fabrics came from the remnants of my first 40 quilts.
This is quilt number 41!
Lots of memories sewn into this one.


Some of the many crazy houses.
This was way out of my comfort zone. It was also my first true scrap quilt.
It was a lot of fun and by the time I finished I loved it!


This duck (there are several like him) is one of my favorites.
He standing all puffed up like our drakes do at times.


This house cracks me up. The egg fabric is upside down from all the others.
Which is funny because that's how you're supposed to store eggs in a carton.
Point side down.
I decided to keep the "mistake".


Another of my mistakes. I decided to leave it.
It's fun to look for it.
There is also a dog that's wrong side out.
I haven't found it since I finished the quilt.
;)


Village Quilt
#41
84 3/4" x 81 1/2"
machine pieced & hand quilted

Hand Quilting stats:
quilted 125 days (6/27 - 12/25)
136 1/4 hours

Friday, July 23, 2021

The Lil' Fidget Quilt


I made a little fidget quilt.

People make fun of Pinterest. I use it for quilting research. I literally have thousands of pins in my quilting board. It's my go-to library. I had lots of information on fidget quilts saved and was eager to make one. It took a couple of weeks to get this whipped up...that's fast for me since I'm at work 40 hours a week. It was fun making this and as usual I learned a lot.

I love making quilts. It's easy sewing. All straight seams. Any other kind of sewing stresses me out! So for this quilt I had to stretch my sewing comfort zone. I learned to sew a pocket, velcro, and a zipper! Things I would have never tried had it not been for my great desire to quilt. I'm still not going to be a seamstress by any means but at least I can say I've sewn a zipper.

This quilt has 25 squares. I loosely followed a free fidget quilt pattern. It has buttons, ribbons, velcro, pockets, flaps, lace, loops, and a zipper. Most of the things I had on hand and only needed to purchase a few items.


Colorful buttons.


The pattern I used had these triangle flaps.


I decided to sew some buttons under a couple of them.


I love the hearts on this lace. I've had this spool of lace forever. It seems to be a never ending spool!


Velcro!


The pattern I followed had some lanyard for tying the rolled quilt closed. I didn't like that so I bought a buckle which I ended up not liking either! I finally decided on elastic which I already had on hand.

The quilt finished at approximately 21 1/2" x 21 1/2"
To my surprise it's quilt #40!